How To Make Homemade Tattoo Ink From Household Items
Making your own tattoo ink at home can be a great way to save some money if you do not want to spend much on your tattoo. You will be surprised to learn how easy it is to produce high-quality tattoo ink using regular household supplies. In this piece, we will tell you how to make homemade tattoo ink from household items.
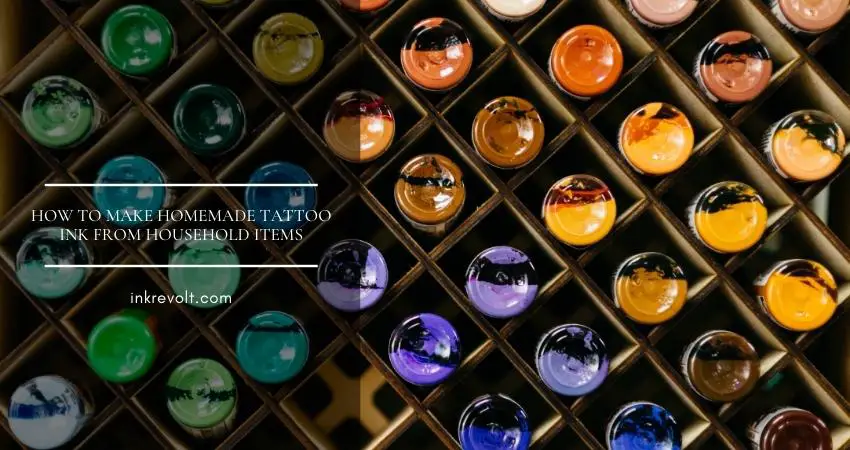
You can make tattoo ink at home using household items like paper and glycerin.
Before we start, we would like you to remember that unhygienic tattoo ink might cause severe infections to your skin. So, do not try any ink recipes you find on the internet. The methods we mentioned below are effective, safe, and easy to do.
Therefore, stay with us for a few minutes and find out how to make tattoo ink at home the right way.
Method 1: The Paper Ash Method
Things You Need
- Lighter
- Paper
- Plate
- Water
- Bottle
Step 1. Burn The Paper
Take a few sheets of paper and get your lighter. Also, take an empty plate or an ashtray. If you are using an ashtray, make sure it is completely clean. Take a page and burn it over the plate so that the ashes fall on it. In doing so, you can easily collect the ashes afterward. Do not burn more than one or two sheets at once.
Step 2. Collect The Ashes And Add Water
Pour the ashes into an empty bottle and shake them for a while. Once it takes a fine powdery form, fill the rest of the bottle with water. However, if you are looking for more density, do not add much water. The amount of water you mix will define the thickness of the ink.
Method 2: Wood Ash Method
Things You Need
- Wood
- Vodka
- Gasoline
- Vacuum Cleaner
- Blender
- Grinder
Step 1. Burn Wood
For getting the best quality tattoo ink from wood, you will have to burn it thoroughly. Softwood is the best option since they are easy to ignite. If you use hardwood, pour a bit of gasoline before setting it on fire. Gasoline is optional for softwood, but we would recommend using it as it will accelerate the process and save you some time.
Premium grade ink requires carbon black ashes. Once the fire goes out, the original color of the wood should disappear. Do not gather the ashes immediately after the burning ends. Let it cool off first.
Step 2. Collect The Ashes
Gathering the ashes would be a bit trickier since you cannot burn the wood on a plate. Burn the wood on a clean surface and once the burning ends, use a vacuum cleaner to heap up the ashes. Check the vacuum bag beforehand to ensure it is empty. Otherwise, you will have to filter out impurities before mixing the ash with spirit.
If there are burnt chunks of wood leftovers, grind them to dust with a small hammer. Otherwise, you will not be able to collect the ashes.
Step 3. Grind The Ashes
We have to grind the ashes before using them, if not, you will not get the desired ink quality. Try to reduce the ash particles to their finest forms by taking them in a bottle and shaking it repeatedly. As a result, you will get glossy, rich dark ink. Alternatively, you can use an electric grinder. Just grind the ashes for a minute or so and you are done!
Step 4. Pick A Clear Spirit
To make ink from the ashes, you must mix the ashes with a clear spirit. We will not recommend using water in this case, as we did while making ink from paper, because wood is more susceptible to having harmful microorganisms than paper. To be 100% safe, you can use spirit with paper ash as well.
An alcoholic agent like gin or vodka is the perfect liquid base for making tattoos from ash. Alcohol has widespread use in medicine for its disinfecting properties. So, it will kill off harmful germs and make the ink safe for skin application. You can choose any alcohol you like. The color of the alcohol will not alter the deep black color of the ink.
Step 5. Mix The Ashes With The Spirit
Pour the ashes and the spirit into a blender, turn the lid off, and switch it on for about 20 minutes. The ideal consistency of the ink should be the middle ground between paste and water-like liquids. There should not be any wood fragments in the ink.
Method 3: The Dry Ink Pigment Method
Things You Need
- Pigment powder
- Glycerin
- Propylene glycol
- Witch hazel
- Blender
Step 1. Buy The Pigment Powder Of Your Choice
Decide on the colors you want to use on your tattoo and shop pigment powders accordingly. We would recommend buying from a tattoo shop so that you can get skin-friendly pigment powder. Paint pigments meant for non-tattoo applications like car painting are hazardous for skin applications.
Step 2. Blend The Liquid Base Materials
Put glycerin, witch hazel, and propylene glycol into a blender. Alcohol and water do not do a great job in bringing out the best colors other than black, so we will have to formulate a more efficient liquid base for vibrant pigment paints. The mixture should have 32-ounces of witch hazel, 0.38 ounces of propylene glycol, and 0.38 ounces of glycerin.
Step 3. Add The Color
Add the pigment paint in the liquid base combination now. The more powder you add, the brighter the color of the ink will be. If you are going for a softer hue, use less pigment paint. Add the pigment paint slowly and allow it to mix with the base properly.
Step 4. Mix In A Blender
Put the mixture into the blender and set the machine to its lowest speed setting. If you need to thin it out a bit, add more liquid as the blending goes on. On the contrary, add more pigments to make the ink thicker. Once you are satisfied with the ink density, switch the blender setting to medium and keep the machine running for an hour.
Last Words
Hopefully, this article has answered all the questions you had regarding how to make homemade tattoo ink from household items. The first two methods are limited to black and white inks, and the third one produces colorful inks. To make black tattoo ink, we prefer wood over paper since wood offers better ink consistency.
Also, never lose sight of the safety precautions while making tattoo ink at home. Keep the ink in a sterile container and store it in a cool, dark place.