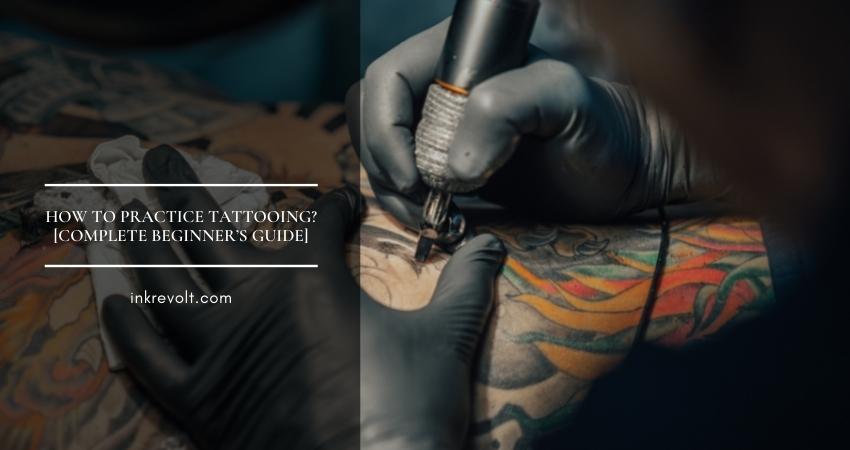
How to Practice Tattooing? [Complete Beginner’s Guide]
For most people, tattoos are body art to express themselves, but your fascination with them runs deeper. You want to dive into the tattoo culture’s deep end and become a tattoo artist yourself. But how to practice tattooing? How do you get started?
Master as many art styles as you can on paper, and then practice on fruits, and finally pig skin. Add 80 grams or 3 ounces of weight to your pen, and then move to a cheap tattoo machine to practice. Use non-toxic, removable markers and henna dye to practice on people. Apply for an apprenticeship, once you think you’ve become sufficiently skilled.
An apprenticeship is crucial for learning about tattooing because you’ll be able to learn about clients, consultation, sanitization, aftercare, and a lot more. But you won’t be accepted as a complete greenhorn. You’ll have to learn by stages as I have explained in this article.
How do I get Started With Tattooing?
You won’t be able to grab a machine right away and practice. It’ll be counterproductive for your progress. Instead, you’ll have to build up your skill level bit by bit at a time and change out your canvas and equipment as you go.
To get started, you’ll have to learn how to draw. You’ll learn that on paper with pens and pencils. If you’re starting from zero, then you’ll want to go through some basic exercises.
- Draw lines.
- Master shapes.
- Understand color mixing.
- Understand how color works on skin.
Draw Lines
Shading and other effects might seem cool to try, but the most important skill is tattoo lining. If you can make strong lines, your tattoos will gain a strong definition. Here’s what you can do to practice.
- Begin with drawing a reference line with a pen and a scale. Then use pencils to draw lines without assistance beside it. Take time and try to avoid extra passes while keeping the lines as straight and strong as possible.
- Once you’ve become skilled with drawing a line, switch to a medium tip marker. This will produce thicker lines that will seem fuzzy or splotchy. Try to produce lines of exact thinness with it.
Master Shapes
You’ll have to get used to drawing shapes, especially 3D shapes. Many tattoos can be deconstructed into combinations of basic shapes. The better you are at them, the better you’ll get at drawing tattoos.
You can try these tricks to master shapes.
- First, draw reference 2D shapes and practice them freehand. Try circles, triangles, squares, rectangles, rhombuses, hexagons, and as many shapes, as you can think of. Once you’ve mastered the 2D shapes, move on to the 3D versions.
- Try using the surface of a ceramic cup as your canvas. Draw the shapes on its outer walls and see if you can maintain symmetry.
- Try drawing whatever draws your fancy after, especially if these are 3D images. Try to deconstruct the image down to basic shapes and draw it in stages.
Understand Color Mixing
Knowing the exact shade that any mixed colors would produce is very important. Without it, you can end up creating odd color combinations that won’t match what your client envisioned. You should try these couple of exercises.
- Get a basic set of Prismacolor markers, and start coloring your drawn images in. Note how mixing the colors produce different shades. Try and copy the exact shades on a colored picture.
- Use that mug again to color on without crossing the lines made.
Understand how color works on skin
Color works differently on human skin. The skin has a shade of its own, and it’ll produce different outcomes than a white page. You can still practice on paper to prepare.
- Get colored papers with similar shades as the human skin.
- Try creating shadows for each shade by coloring on top of them. Start with light colors and go dark. You’ll notice that light colors are easily hidden by dark colors, but the opposite isn’t true.
- Try creating the same image and producing similar shades on all colored papers.
Maybe you’re already decent at it, but you have a preferred art style. Unfortunately, this will become a hurdle that you must overcome. You can choose to stick to tattoos that fit your style, but in your early career, you have to show versatility to attract clients.
Here’s what you can do to adapt to different art styles.
- Purchase a tattoo book. Use the samples inside to copy and practice. You’re looking to pick up the basic themes of each art style and understand what styles are popular.
- You can also do some research on each art style. Read up about their inception, their main focus, themes, and popularity.
Once you understand which styles you can produce well, and which are the popular ones, stick to them. Remember, you don’t have to abandon your favorite style, just grow your skillset.
Now that you’ve gotten a handle on your art, how to practice tattooing more effectively? Well, you can move to more organic subjects.
How to get Realistic Tattooing Practice?
You won’t be allowed to practice on a person right away, for obvious reasons. But many objects simulate the conditions and difficulties of tattooing. You can exploit these and increase the degree of difficulty as you go.
I’ve listed the steps you have to take to practice tattooing. These are listed in order of difficulty. If you feel that these are too easy, don’t rush through. Gauge your skill carefully before moving on, otherwise, you’ll be lacking in your foundations.
- How to practice tattooing on a fruit.
- Attach weights to your pen.
- Get a cheap tattoo machine.
- Learn about the basics.
- Take a marker to your friend’s skin.
- Use pig skins.
- Practice with henna dye.
- Use synthetic skin.
Additional Read: Tattoo Practice Skin Alternatives
How to Practice Tattooing on a Fruit
You can start by practicing on fruits to understand tattooing difficulties better. Apple, orange, and banana skins are textured and contoured. Drawing on these is difficult and similar to working with human skin.
Oranges have porous skin that is quite like human skin. So, working on oranges will give you the best practice.
You can start by practicing drawing right onto the fruits. As you become more skilled, you can practice applying stencils on the fruits. Once you’ve gotten your tattoo machine, you can tattoo onto the fruit peel, especially oranges by following your stencils.
Attach Weights to Your Pen
You’ve been working with a pen, marker, or pencil so far. But you’ll have to work with a machine. It has some heft and produces vibrations. You’ll have to learn how to deal with them.
Attach 80 grams or 3 ounces of weight to your pens and pencils. You can do this easily by stacking hex nuts or washers on them. You can only secure the last one you put on your pen so that the others move around a bit. It’ll cause a balancing issue that’ll train you for the vibration.
Practice drawing on paper and fruits with this modification and see if your lining skill still holds up. You’ll be more than ready for a tattoo machine once you get a hold of this exercise.
Get a Cheap Tattoo Machine
Get a cheap, but somewhat reliable tattoo machine. Get some tattoo ink for practicing as well. Get familiar with the machine’s operations, and use it to work on fruit.
Oranges work best for this, as the peel has a similar texture, and you can’t go in too deep. The cheap machine will get the job done, and you can inspect the parts without concern. If it breaks, fixing it will add to your experience.
Learn About the Basics
Tattooing doesn’t start with, nor end with the tattoo machine. You’ll have to know about consultation, marketing, dealing with clients, aftercare, instructions, and more if you want to be an artist. So, read up about every aspect of tattooing that you have to know.
Also, you have to learn extensively about ink, and its properties. You have to learn about different types of tattoo machines and their purposes. The most common types are –
- Rotary tattoo machines.
- Pneumatic tattoo machines.
- Shader tattoo machines.
- Liner tattoo machines.
- Coil tattoo machines.
Of these, the coil tattoo machines are the most used. Learn as much as you can about each type and why they are used.
Take a Marker to Your Friend’s Skin
Find a friend who’d agree to let you practice. Then use a non-toxic, removable marker to draw on their skin. You can find someone who is ticklish to understand what it’s like to deal with a squirming client.
Use Pig Skin
Pig skin is remarkably similar to human skin. So, you can ask any butcher to cut your square pieces for practicing. You’ll have to work on it while it’s fresh though. So, stocking up won’t help.
Practice keeping the tattoo machine at 1-2 millimeters depth. This is the depth at which the dermis layer begins. You want your ink pigments to be deposited in this layer, and not beyond or above it.
Practice With Henna Dye
Get that friend again or try working on your skin. Henna tattoos stay on the skin for a few months, but they will eventually fade away. Practicing with the dye will not test your ability to reach the dermis layer, but the sense of semi-permanence and its application method will test your accuracy and consistency.
Use Synthetic Skin
You can also purchase synthetic skin to practice on. These will provide you with the most accurate experience of tattooing someone. Unfortunately, synthetic skin can be quite costly.
You can, however, make synthetic skin to avoid the cost. Here’s what you’d need to make it at home.
- Elmer’s glue
- Plastic bag
- Cornstarch or flour
- Warm water
- Flesh paint
- Bowl
- Rolling pin
- Fork or whisk
Once you’ve got your hand on these ingredients, follow these steps.
- Mix 1/3rd cup of warm water with 1/4th cup of cornstarch or flour in the bowl. Whisk the mixture until it turns firm and thick but pliable. Use more cornstarch or flour if needed.
- Use the rolling pin to roll the mixture into a flat sheet.
- Mix a few drops of the flesh paint with Elmer’s glue in the plastic bag. Once the mixture has the color you want, cut one corner of the bag. Pipe the mixture through the hole onto the sheet.
- Roll and knead the mixture to bind the glue with it. Add more glue if you feel like it’s needed.
- Now roll the mixture into a sheet again. The thinner it is, the easier it’ll be to work with. Cut it up in squares if based on your projects.
- Let the sheets dry completely.
Once completed, it’ll resemble human flesh textures and other qualities quite closely. Combined with pig skin, this is how to practice tattooing as realistically as possible without working with human skin.
Now that you’ve mastered as much tattooing as you can on your own, it’s time to move on. You need real experience at this stage and getting hands-on experience is the only way to go.
Get an Apprenticeship
For real-world experience, you need to apply to a tattoo shop for an apprenticeship. You’ll be hired in as an assistant and shown the ropes. Apprenticeships are also crucial because they are considered formal training, and that’s a requirement for getting licensed as a tattoo artist.
Of course, you’d want to apprentice in a tattoo parlor that’s popular or reputed. Getting in won’t be as simple as just handing in an application. But you’ve practiced and amassed enough skill at this point to be seriously considered by any tattoo parlor.
Collect all the work that you’ve done so far and build a portfolio. It should contain 25 to 100 finished works. Don’t showcase any half-complete works or doodles. Include and show off all the styles that you’re capable of.
Take it directly to the tattoo parlor that you want to apprentice under. Don’t call, text, or mail them. Just go in and say hi.
If they’re interested enough to look, then listen more than speak. Answer any questions they might have and note any advice they give. Be polite, professional, courteous, and respect their time.
If an artist decides to mentor you, they won’t just teach you about tattooing. They’ll show you how the entire process happens, and you need to pay attention. Also, you’ll be volunteering at best, and typically will be paying for your apprenticeship. You’ll also have to sign a contract.
Conclusion
Apprenticeships take 2-3 years to complete, but if you’ve already made great progress on your own, this can be to your benefit. All the practice you’ve subjected yourself won’t go unnoticed, and the shop will have a higher likelihood of offering you a job.
No matter where you are in your training, remember that persistence is key to how to practice tattooing. Your apprenticeship especially will challenge and frustrate you. Just keep working on the next step and then the next. You’ll be a professional artist before you know it.