How To Use Magnum Tattoo Needles: [The 5 Step Guide]
Getting inked can be an exciting experience, especially among the youths and it is such a commonplace mode of fashion that seeing someone without a tattoo these days is really tough.
Well, in this article, I’m going to go over the simple 5 step process about how to use magnum tattoo needles to create a tattoo design smoothly as per your client’s needs, because magnums are much popular and the go-to tattoo needles for most of the shading work.
As you’re a professional tattoo artist, I know how important it is for you to have a good grasp on using magnum needles.
So, without further ado, let’s get straight into it!
What Are Magnum Needles?
The Mags or Magnum needles have needle points that are grouped in 2 rows, one on top of the other.
A magnum’s taper length is often greater than the taper which is found on round shaders. This is why they can contain and deliver lots of ink, which makes them suitable for large areas of color packing and shading.
You also require fewer passes over an area using magnum needles, meaning that they cause less trauma to the skin.
Types of Magnum Needles
1. Weaved Magnum Tattoo Needles:
Though these needles are the same as flat needles, they are soldered on alternating sides of the needle. So, one needle will be soldered to the top, one to the bottom, another to the top, and it goes on, meaning that they are able to cover a greater area.
These tattoo needles are marked as M1. Such as, 9M1 refers to 9 weaved magnum needles.
2. Stacked Magnum Tattoo Needles:
On both sides of the stacked magnums have a double row of needles and they are placed more closely together than the weaved ones. Stacked magnums are used for blending, shading, and coloring large areas.
These needles are stacked closely just as you stack soda cans laying on their side, for a seven mag, 4 on the bottom and 3 on the top. The 2 rows are separated more than round shader needles so that the color dissemination can be a bit smoother.
They are marked by M2. For example, 9M2 refers to 9 weaved magnum needles.
3. Round or Curved Magnums:
Round magnums, also known as curved magnums, are a newer version of magnum. They are arranged in such a way that they have a tip arching at the center.
The needle’s round edge can get along well with the skin, which allows better ink dispersal. The curve of the magnum also causes lesser harm to the skin and gives a better flow of ink. Round magnums are used for blending, shading, and coloring large areas.
They are marked as RM with the number of needles beforehand. For instance, 5RM refers to 5 round or curved magnum needles.
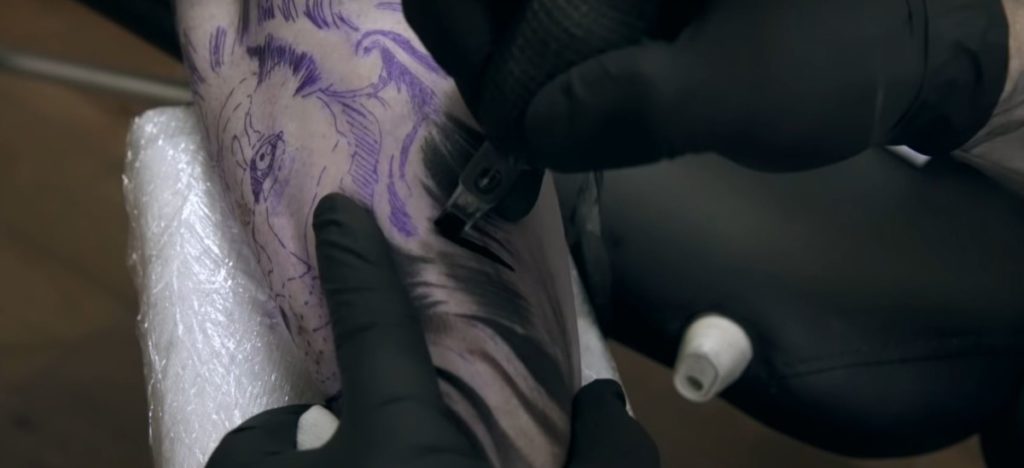
How To Use Magnum Tattoo Needles: 5 Steps
Proper use of magnum takes lots of focus and practice. Here are 5 steps that you should follow while using Magnum Tattoo Needles. Here we go:
Step 1: Using at an angle
To use a mag properly, you have to use it at an angle. Because it needs to hit the skin at an angle all the time. If you want the mag to lay flat on the skin, lay it down so that it goes into at a slight angle.
Do not use a mag directly on the skin like holding because if it goes in straight, not at an angle, it can pinch your client and stick into the skin, which will cause the needle to jump.
Step 2: Don’t push forward
Make sure to drag the magnum across the skin all the time. Avoid pushing forward because it can trigger the magnum to dig into the skin, which causes pain and gets the needle caught.
Always color in a circular motion because a magnum is wider and it covers more area quicker than a conventional round.
Step 3: Consider dragging the mag
If the needle lies flat on the skin, you get to lift the eye loop until you have got around a 40-degree angle. Always consider dragging a mag, do not push it.
That means that you need to pull the machine away out of the tube tip, which is the same as driving a car backward.
Step 4: Follow a circular motion
If you choose to push the mag ahead, then it’ll be prone to going beneath the skin, which makes it tough for the needle to bring back and go onward again.
Solid coloring with a mag is just the same as coloring with a lining needle. Though you would like to dye in the circular motion, since the mag is wider just like a paintbrush, you will cover up more area quickly.
Using a mag is just like using 3 lining needles to color side by side. You may cause more injury to the skin if you decide to go slower.
Step 5: Wipe often
Wipe off all the extra ink often so that you can pick up on the skin texture while you’re tattooing with a magnum.
Notes:
Though it takes a lot of practice, you can make use of the edge of the needles like a liner by turning a mag on its side. Just buy one of the big black markers having tapered tips to practice using a mag needle.
To create a bold line, practice using the marker at a flat angle. After that, turn the marker to get a much finer line. Bear in mind that you go backward to imitate the needle use.
Additional Read: Setting Needle Depth on A Rotary Tattoo Machine
Frequently Asked Questions (FAQ):
What are magnum tattoo needles used for?
Magnum tattoo needles are preferred for a wide variety of shading and they are ideal for bigger spaces.
As magnum tattoo needles can allow plenty of ink to transfer at a time, these needle types are brilliant for covering larger areas within tattoos.
What tattoo needle is best for filling?
Weaved Magnum Needles are the best fit for filling up tattoos as well as shading and blending.
Can you line with a magnum needle?
Yes, you can. Actually, both the Stacked magnums and Round curve magnums can be used for lining. But the condition is that you have to turn the needle to the side.
Final Words
I hope by now you’ve got a clear understanding as to how to use magnum tattoo needles. Hopefully, you’ll be able to hone your tattoo-making skills using these magnum tattoo needles with ease.
If you’ve got any more questions regarding this topic, please feel free to leave a comment and I’ll be happy to update this article later on for your convenience.
Happy Tattooing!
Articles You May Find Interesting: